Showing posts with label DIY. Show all posts

Monday, November 4, 2013

Where I get Inspiration & My Thanksgiving Tablescape!

Happy Monday! I'll be back later today to announce the big winner of the Susan Branch Calendar Giveaway... I am so excited!!

I get a lot of questions from people as to where I find my inspiration & where I buy my decorations. To be honest, everywhere! I find inspiration in window displays, magazines, outside, & talking to people ( I don't have cable but I do get ideas from movies & shows on Netflix, too)& when I did have TV as a child I remember lots of inspiring commercials & shows (oh, trading spaces how I loved you)! 


Where I Get My Inspiration


As to where I find my treasures, three main sources come to mind:

Thrift stores- (I go once a week & find lots of fun things that cost a few quarters & that makes it easy for me to try new things, succeed or fail & move forward), remember the vintage Halloween pictures, those frames were .25¢ a piece!

Clearance- For example, I love Target holiday decor & buying things when they go on clearance is a wonderful way to keep your decorations fresh every year! Over the weekend I went to target & loaded up on Halloween decorations at 50% off. Soon they will be 70% off & I will go back. Sure every once in a while I miss out on something, but my patience is always rewarded with major savings!


 Lastly garage sales- this is where I find large items & vintage items. A garage sale is a great place for outside decorations that are hundreds of dollars new but only a few dollars now. For example back in August, I bought a 9' inflatable santa with LED lights in the box for 3$ (you just have to ask to plug things in before you pay).


One major tip I have for year round saving is to buy year round. If you see a Christmas decoration you want in March, buy it, put it away & forget about it! I have a tote bin in my office year round for decorations, when I see something I want big or small throughout the year I buy it & place it in the bin, put the lid on top & forget about it! Then at the end of September I open the bin & remove & organize the items for the upcoming holidays! It's really fun!

I thought it would be fun to show you my Thanksgiving tablescape for the buffet while also telling you where I got the items, I know sometimes it's hard to come up with places to get things you like & I realized when setting it up this year, I shopped around.


 Thanksgiving Tablescape


1.  An old frame from a thrift store, spray painted gold with a piece of shower wall board to write on (the dry erase markers work just the same!). Dry erase boards are expensive, one this size is 150$ or more! So making this one for less than 20$ was my idea of a good time! We've had it up & used it for about 5 years now & it's still going strong.
2.  Paper decorations make my heart pitter-patter, they're just so delicate& growing up I always had them in my home, in the past, the dollar store has always been a wonderful source for these sweet decorations


3.  Candle sticks make everything festive! These are from Home Goods, & were sold individually for a few dollars a piece.

4.  I love this bowl! It was a Better Homes & Gardens Exclusive at Walmart a few years back & it is just the perfect size for mashed potatoes on Thanksgiving day!
 
5.  What is Thanksgiving without a peace offering cornucopia?  This one was a thrift store find & I just bought some leaves & berries at Michael's & use some mini pumpkins to make it pop!


6.  Mr. & Mrs., these adorable pilgrims are from Cracker Barrel. That store is such a hidden gem of holiday decor! I always find items to love there & they always have a clearance corner from the season before!


7.  A wreath, I like to use wreathes on tables as well as to hang, I'll switch year by year where the wreaths go & this year it's a great centerpiece for the table.


8.  Turkeys, these turkey candle holders were another thrift store find, I just loved their charm!

9.  Pumpkins, but really any gourds or apples would work, I love incorporating plants & food as much as possible, it's all part of the bounty of Thanksgiving!

10.  Lights; candlelight, twinkle lights, or a dimm-able over head light can make a place feel so warm. I always find a way to layer it in. ( yes, my husband snuck in a toy in this last photo)...do you see him?


It's just another everyday, holiday with jillie


Wednesday, October 23, 2013

Do it yourself; painted pantyhose pumpkins!

Sometimes inspiration strikes, with a twist! If you caught the segment on the today show about unique pumpkins you'll know what I'm talking about. If not, watch the video (you know that hamburger is adorable)!


Visit NBCNews.com for breaking news, world news, and news about the economy


So after seeing the Today Show I thought about what I wanted to do to my pumpkins this year. I had been toying around with the idea of a stencil, or some sort of taped on pattern. Then it clicked! Why not put the pantyhose over the pumpkin & then sponge paint over it to make a funky pattern! I thought if it turns out horrible I can spray paint the whole thing & glitter it! What's to lose?

I rummaged through my pantyhose drawer knowing there would be some forgotten,  "these will look good someday" pair of pantyhose that would do the trick. I felt like I hit the jackpot when I found these patterned ones. So here you have it, a 15 minute craft for you & the kids!


Painted Pantyhose Pumpkins;

say that three times fast


pumpkins
paint
pantyhose
paint brush
wrapping paper
sponge 


Begin by selecting your pumpkin, I choose a small white one so I could have a black & white theme.


Cut wrapping paper & place it in the table to protect it.

Next take your hand & guide your way through the leg to the toe, slide your pumpkin tightly into place in the toe area.


Adjust the pattern to a place you like.


 Then twist on the bottom for a snug fit. Dab some paint onto your sponge & then dab it a few times onto the wrapping paper to create a nice light application.


 Follow your way around the pumpkin & when finished set down to dry.


 After 10 minutes of so come back & slide your pumpkin out of the pantyhose. I painted my stem as well.


 If you're using a plastic pumpkin or fun-kin spray with a clear coat for years of enjoyment!  I love the random pattern I was able to achieve! So what are you waiting for, you have a fun craft to do with the kids! 

When you're done crumple up your wrapping paper & clean up is a breeze!


It's just another everyday, holiday with jillie

Tuesday, October 22, 2013

Do it Yourself: spooky graveyard!

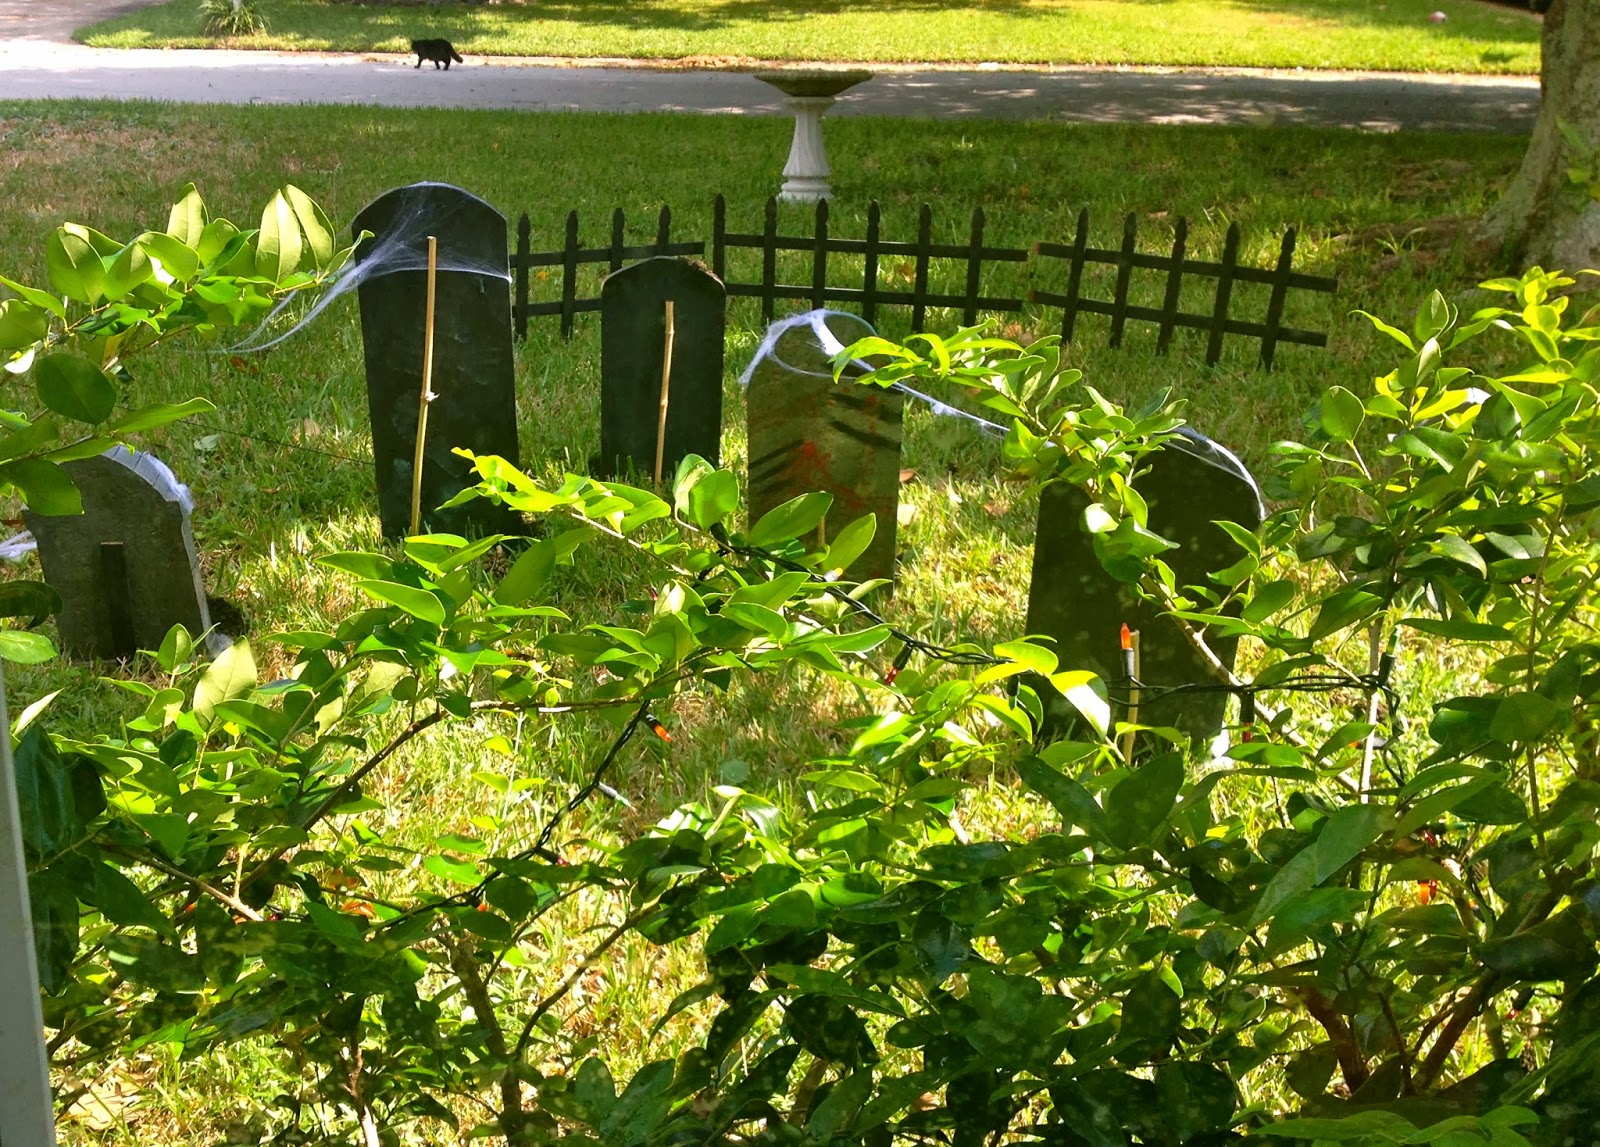
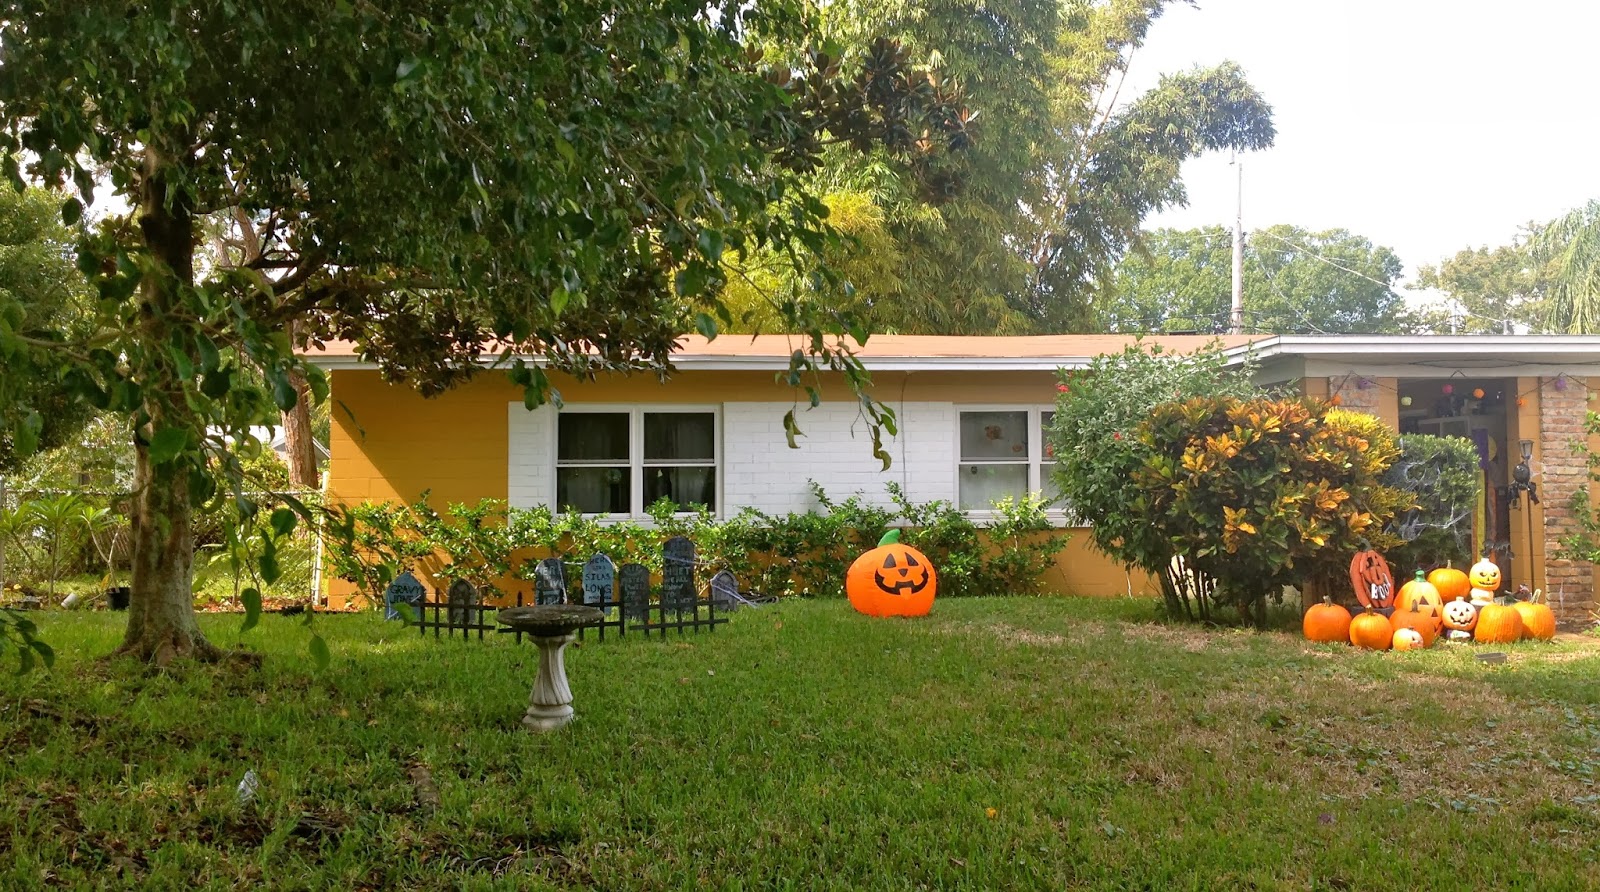
I decided to tackle a larger project this year for Halloween & take on an entire graveyard! It was really fun & a great way to get the entire family involved. Not to mention it was pretty inexpensive, & totally scary!! In other posts I have mentioned that I do not do scary very well, but was out voted by the family to try something new. I have to say it makes it a lot less scary when you make it yourself & crafting together is always fun! This project took about an hour & is family friendly! So get outside this weekend & enjoy the weather! 


spooky graveyard

1/4" plywood, 23$
paint, 3$
spiderwebs, 1$
bag of soil, 2$
bamboo rods 2$
jigsaw
paint brushes
garden fence


We started with a sheet of 1/4" plywood that we picked up at Home Depot, Matt used some of it for another project & there was quite a bit of scrap left. It was just a plain sanded pine board, nothing fancy, not pressure treated or anything.

 We had a lot of paint as well so we didn't buy any, but you can buy exterior paint sample pots for less than 3$ a piece which is great! We used a charcoal blue color, black & hunter green. We each made a tombstone & you can see our different styles.


 We cut each tombstone into long strips & as wide as we'd like, with the jigsaw (Matt loves his Ridgid if you're in the market). Then we painted a half circle for the top of the tombstone to show where we wanted to cut.


 Next we painted our hearts out, up & down, no real rules or guidelines. Once we got our base color on we flicked, splatted & sponged the other colors on for dimension, again just wherever we felt like. Red paint mixed with water is great for blood! No one used a stencils, we all just free handed our words. This is Matt's, he cut a jagged top to make it look broken with the jigsaw!


 Coming up with what to write on the tombstone was probably the hardest part! Sydney painted this one, it is a quote from one of her favourite Scooby-Doo episodes.


 I just rhymed a name with alive, not gonna lie, I wish I was more clever!


 Next came the time to get them out front. I took some bamboo poles, & cut them with a little hand saw. Various lengths that I kind of matched to go with the height of the tombstone, nothing exact.


 Then I held them & hammered gently. Voilá!


 I felt that they looked a little plain, so I bought a bag of soil & sprinkled some in front of each tombstone. I see a big difference!


 Next I took my bag of spiderwebs & draped it on a few of the tombstones. It really was coming together at this point.


 Matt suggested we take a few of my extra garden fences & spray paint them black, after all we want to make sure nothing & no one get out, spooky! Spray painting is easy if you work in a well ventilated area using quick even strokes & apply multiple coats.Once they dried I hammered them in place!


 While I was in the office typing I looked out the window to see a black cat wandering by the graveyard! Looks like Halloween is coming!!


During the day it's not too scary for the kiddos, but at night with the strobe light, it has a creepy feeling!


 It's just another everyday, holiday with Jillie


Monday, October 21, 2013

do it yourself: vintage halloween picture frames

Part of the charm of any holiday decor is homemade. Welcoming guests into a space you put time into creating allows them to feel like they are experiencing your home, & in turn learning something about you that is unspoken. A home should be seen as your heart on a sleeve. The things that matter to you most are bursting the minute someone opens your front door. Family photos, pets greeting you at the door, decorations, smells of candles or cookies or perfume, it's all a reflection of you. What do you want to say without speaking a word? 

Vintage charm is appealing to so many because the craftsmanship is of high quality, the verbiage is often flowery & romantic & it isn't a common item that makes you feel cookie cutter. I have a deep love for pieces previously owned, I want to feel the love & see the character of a lifetime. Sometimes we also see things created to look vintage & with that comes a higher price tag. For the life of me I will never understand wanna-be antiques with large price tags, it's not really special & it's usually not well made, so why are you gouging the price? If i had one word of wisdom it would be to save for the heirloom pieces. Bring them into your home with open arms & cherish them. Pass them down to your children & if it's not their style pass onto your grandchildren. You know how nothing goes out of style, it just cycles through a generation.

This craft is a nod to those expensive wanna be antiques that are over priced for no reason. I literally replicated the same quality for pennies & these are items that though aren't real antiques will stand up to being boxed away & brought out, year after year.

vintage Halloween picture frames 

Scratched & worn picture frames at the thrift store should range from .25¢ to 1$
Printed pictures at home 
Card stock
Scissors
Glue stick
Spray paint

Start by picking out frames that catch your eye, they can be metal or wood. Try to steer clear of any frames with large gouges in them unless you plan on using wood filler & sanding it, which seems more trouble than this project would deserve. Surface scratches, chipped paint & outdated wooden frames with gold accents are perfect & inexpensive. 


 Step One; Spray Painting

Clean your frames with warm water & soap.
Wash the glass & let dry.

Next, find a spray painting zone, someplace well ventilated, a cardboard box cut open is great! I spray paint so many things I actually have some old stepping stones stacked by our workshop that I use as my zone.

Get your handy-dandy bottle of spray paint, for the black frames I used a cheapy brand that cost 1$ for the can & it worked just fine.


The oiled bronze bottle of Rust-Oleum paint & primer is about 8$ a can & worth every penny in my opinion, (the handle is comfortable to grip, the spray is even & it applies nicely on different materials).


An important tip about spray painting is to start spraying before your project that way you're not getting a round spray blob with spidery lines (see the blob to the top left of the frame on the stone).


Get a feel for your can & move quickly, do not try to apply only one coat, rather you should apply two or three light coats layer by layer.


Here is a video showing the first coat, demonstrated by my wonderful husband, notice how quickly he's moving!


Once you've finished the top & sides let dry for about 15 minutes, it will still be a tad tacky to the touch, if you need to spray paint the back now is the time (some will be black already or velvety).

 Step Two: Finding & Printing Images

While your frames are drying begin a Google search, for Vintage Halloween Images, click an image you like & then save the image to your desktop, resize to fit your frames & print.

My printer has resizing options & image quality choices, I selected "best photo quality" on "regular paper".

Once printed I placed my pictures next to the card stock & let my imagination run.


I kept with a traditional orange & black theme & aimed for variety with polka dots, stripes & zigzags. The frame with the little girl atop the pumpkin came with matting inside so I just put the picture in & was finished!


 Next, I cut out my images using a crafting blade & scissors.


 I folded flaps to glue my pictures rather than gluing the actual image. That way it didn't look like it had specific glue spots anywhere.


 I let the glue set for a minute & put the frames back together with my new pictures inside!


You might be wondering what happened to my oiled bronze frame, I thought that deserved something very special, Sydney's latest school picture!


It's just another everyday, holiday with jillie